Prior to C# 7, I have many, many times found myself needing to pass a hard-coded list of key-value pairs to a method, and I’ve had to do it painfully:
This file contains hidden or bidirectional Unicode text that may be interpreted or compiled differently than what appears below. To review, open the file in an editor that reveals hidden Unicode characters.
Learn more about bidirectional Unicode characters
We can make this marginally better with a factory function:
This file contains hidden or bidirectional Unicode text that may be interpreted or compiled differently than what appears below. To review, open the file in an editor that reveals hidden Unicode characters.
Learn more about bidirectional Unicode characters
Then we can swap the list with an array to improve it a little more:
This file contains hidden or bidirectional Unicode text that may be interpreted or compiled differently than what appears below. To review, open the file in an editor that reveals hidden Unicode characters.
Learn more about bidirectional Unicode characters
Finally, we can use ‘params’ on the method so we don’t need to declare an array on the caller:
This file contains hidden or bidirectional Unicode text that may be interpreted or compiled differently than what appears below. To review, open the file in an editor that reveals hidden Unicode characters.
Learn more about bidirectional Unicode characters
Okay, so it’s not too bad, but we still have that factory function which I’m not a fan of.
Value Tuples
Briefly, Value Tuples let you do things like this:
This file contains hidden or bidirectional Unicode text that may be interpreted or compiled differently than what appears below. To review, open the file in an editor that reveals hidden Unicode characters.
Learn more about bidirectional Unicode characters
You get a small value type containing your two values, that you can declare inline, and access the individual values in the result.
You don’t just have to use these in return types, you can use them anywhere a type definition could be used.
I’ve generally been a little reticent to use this new-ish feature too heavily, because I’m worried about people using them where they should actually be defining types.
That being said…
Making Our Parameters Nicer
In C# 7, now we get to pass those key-value lists the nice way:
This file contains hidden or bidirectional Unicode text that may be interpreted or compiled differently than what appears below. To review, open the file in an editor that reveals hidden Unicode characters.
Learn more about bidirectional Unicode characters
If you didn’t see my previous post on setting up an Arduino, then to catch you up, I’ve got a rowing machine, and I am trying to replace the basic LCD display on it with my own; to do this I need to read the sensor data it collects and process it myself.
This is my ‘competition’ right now
Just so everyone is aware, this post could also be titled, “How I struggled with basic electronics” or “How you shouldn’t make assumptions when reverse engineering something”.
When I started this little project, I looked at the existing board that provides the LCD display for the rowing machine, and saw the two connectors. One for speed (which goes to the fan wheel at the front) and one for count (which goes to a sensor under the seat).
The connectors on the back of the PCB.
I made the assumption that because speed is an analog value, then the incoming data should be analog as well. This turned out to not be true, but first I’ll show you the wiring/code that told me it was not true.
Wiring
The connector for the speed sensor is actually a 3.5mm mono female jack:
The jack on the right is the speed sensor, the one in the middle goes to the seat movement sensor.
So, I got a cheap 3.5mm cable, cut the end off it, then wired it to a junction.
The wired mono jack.
I was momentarily confused by the fact there were 3 cables rather than 2 for a mono connector, but it turned out that the yellow wire was wired straight to the red, so I just ignored that one.
Reading an Analog Value
I thought that the speed sensor might be some sort of variable resistor, so that as the speed increased, the voltage allowed through the connection would increase.
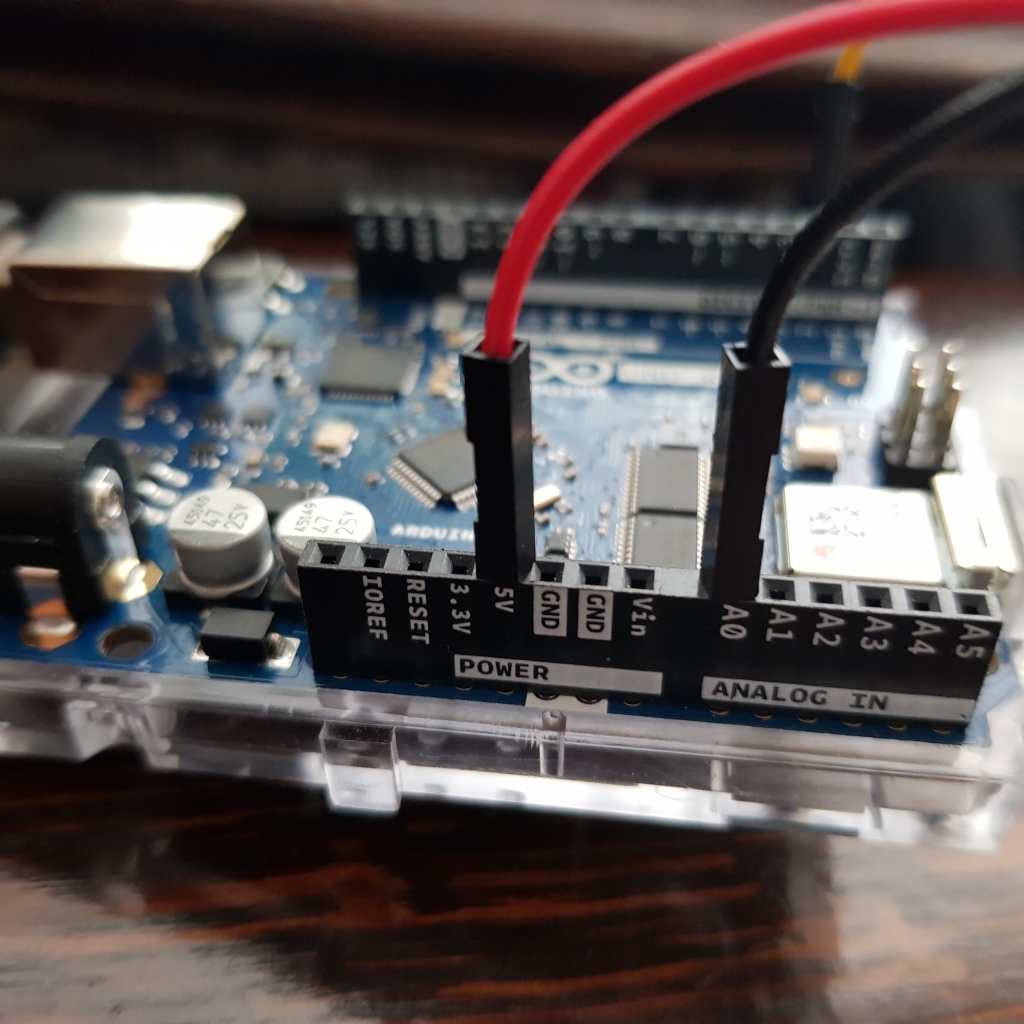
So to start with, I connected the 5V line on the Arduino to the red wire on the junction, and the black wire (GND) to the A0 analog input pin on the Arduino:
Wiring to the analog input pin.
Then, I wrote some code to read the analog value (in volts) and write it to the Serial connector:
This file contains hidden or bidirectional Unicode text that may be interpreted or compiled differently than what appears below. To review, open the file in an editor that reveals hidden Unicode characters.
Learn more about bidirectional Unicode characters
Before you connect the sensor, you just get analog ‘noise’ because there’s nothing connected to the A0 pin:
Voltage data from a floating analog input
Once I connected the 3.5mm jack to the rowing machine’s speed sensor I got:
So that already tells me that the circuit is complete, and I’m seeing the 5V from the Arduino coming back.
When I pull on the rowing machine, my numbers change, but only very slightly (and not really in a way that relates to the speed):
Not much change in the voltage…
I was definitely expecting more change in values from this; and as soon as the wheel of the rower starts to slow down, the number goes back to 5V.
What’s going on here? It doesn’t so much look like the voltage is changing with speed, it’s more like something is slightly interfering with a stable voltage reading…given the nature of the analog value sampling, it stands to reason that a switch rapidly changing from on to off and back might look like this…
Using a switch to read speed
So how can you use a switch to read speed? Well, I suspect there is a magnetic reed switch inside the wheel of the rowing machine, with a magnet attached to one of the blades of the fan inside the wheel.
Each time the magnet passes the switch, it will cause the circuit to break temporarily. The faster the blades spin, the more often the circuit will break.
To detect this, I need to change my approach a bit, and rather than read analog values, I need to read a digital value.
In order to get this working I had to sort out some basic electronics; I used the guide found here, which gave me the circuit I needed to make it work. It’s not too complicated to wire up, here’s the final diagram:
Circuit Diagram of the switch reader
It looks much less neat than that on the breadboard, but here it is:
The circuit to detect the state of the switch.
Then, I added the following code, to sample the digital input and watch for transitions.
This file contains hidden or bidirectional Unicode text that may be interpreted or compiled differently than what appears below. To review, open the file in an editor that reveals hidden Unicode characters.
Learn more about bidirectional Unicode characters
Now, when I plug this into the rowing machine and I give it a good couple of pulls, I get some meaningful speed readings out that correlate with how hard I pull it!
Pulling on the rower gives me increases in speed!
Next post will cover getting the data off the Arduino; connecting up the WiFi on my board and sending an HTTP request with my speed data!
I’ve got a rowing machine in my garage that I use pretty regularly, and it displays some statistics on a basic little read-out, including speed, calories burnt, number of ‘strokes’ and so on.
The rowing machine read-out.
My mission is to replace the simple LED read-out with my own board that will capture the sensor data it uses, upload it somewhere and then do some fun stuff with that data.
For background, I have a little past experience in embedded programming, but I haven’t used it in years. I understand the basics of GPIO pins and similar, but I place myself firmly in the ‘beginner’ category with embedded development.
I hadn’t touched an Arduino before today, when I started writing this post, so this is going to cover just getting to grips with Arduino basics, and subsequent updates will go through all the steps needed to mod my rowing machine!
Picking an Arduino Board
My only real criteria for picking an Arduino board is that I can connect the sensors on my rowing machine, and also that I can connect to WiFi to get data off it.
The back of the rowing machine display.
From the connections on my rowing machine, I can tell I need two connections on the board that can read analog sensor values, so I knew I would need two ADCs (Analog to Digital Converters) on my board, one for the speed and one for the counter.
Going through the Arduino website to figure out which board I wanted (turns out there’s a lot of choice), I picked the Arduino Uno Wifi Rev2, which:
Has 2 ADCs (for reading the sensors on my rowing machine).
A built-in WiFi module for connectivity (so I can upload my data).
A pretty attractive price of about £35 (as of writing in May 2019) plus shipping.
Shipping only took a couple of days, and once it arrived I was ready to go. You will also need a USB Type B cable. You can pick one up off Amazon for about £5, but I had an old one lying around.
Setup
After plugging in the Arduino board with the USB connector, I went to the getting started guide for my particular board (the site has different pages for each one).
I believe that a lot of the following content should work for most Arduino boards that don’t have WiFi, but I am not certain.
From there I tried out both the web-based and desktop IDE Arduino provide, but I decided I want to work in a familiar environment. Luckily, it turns out that trusty VS Code can come to my rescue, because it has an extension for working with Arduino, with the added bonus of having decent intellisense.
You will need to download the regular Arduino desktop IDE from here before you can use VS Code with your Arduino; the extension needs to use the tools it supplies.
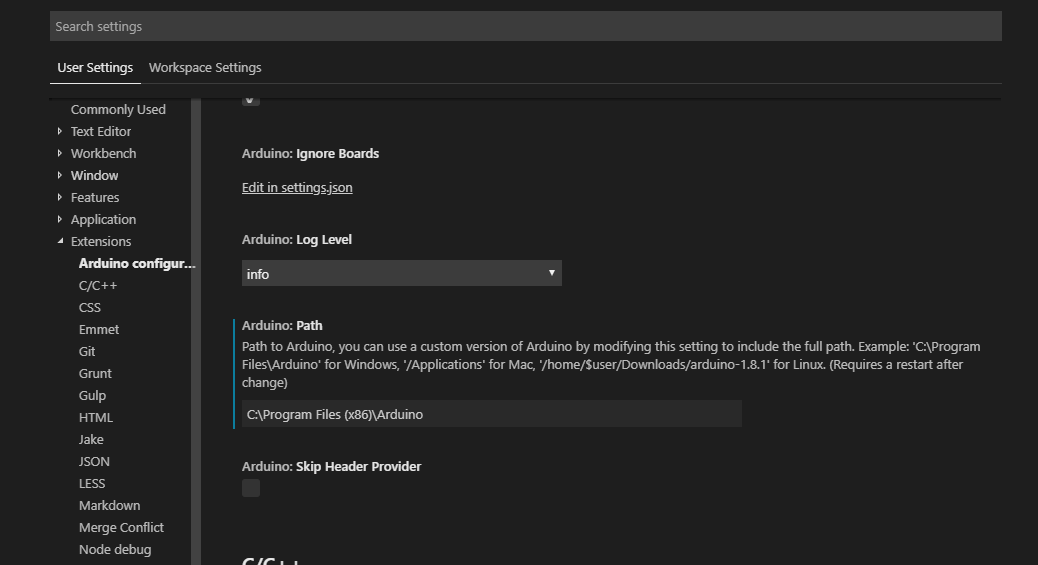
Go ahead and install the VS Code Arduino extension (by Microsoft), then go and configure the extension if you need to set the installation path for your Arduino installation to the non-default setting.
What is an Arduino Program?
What actually is an Arduino Program anyway, and how is it different from a console application on my desktop?
Basically, all Arduino ‘programs’ run C++ code you write. Each program fundamentally consists of a setup and a loop.
This file contains hidden or bidirectional Unicode text that may be interpreted or compiled differently than what appears below. To review, open the file in an editor that reveals hidden Unicode characters.
Learn more about bidirectional Unicode characters
You can sort of think of setup as your ‘main’ method, but you exit it immediately and start looping.
One thing that you need to remember with an embedded program is that your program never stops; it runs until the device doesn’t have power, you reset the board, or you upload a new program. There is no ‘exit’.
In an Arduino program you can do a lot of the things you’d expect from a C++ program, like having additional C++ code files (files with a .cpp extension work just fine). You do have a lot less memory to play with though; the processor on my Arduino only has 6KB of RAM. As someone who tends to work on web applications that consume hundreds of MB, it’s a bit jarring, but 6KB is actually plenty for my needs.
When you want to run your program, you compile it as you would with a normal program; the Arduino components on your desktop then upload the program to the device (over the USB connection) and store it in Flash memory. Again, you can’t have massive applications; my board has 48KB of Flash to fit the program in.
My First Arduino Program
First off, I’m going to make an LED flash. Big stuff, I know. My Arduino (and most of them I think), have a built-in LED that you can turn on and off from your program.
Let’s make a new project in VS Code. Create a new folder somewhere and open it in VS Code.
Then, to start a new ‘project’, run Arduino: Initialize from the command palette. This created a blank app.ino file and let me select my board, which got me started.
I found that I got an intellisense error in the created ino file:
Clicking on the ‘fix-it’ bulb took me to the C++ include path settings:
After a quick search of the Arduino install directory for ‘pgmspace.h’, turned out I was missing an additional include path:
After I added that to the list with the necessary extra backslashes, closed and then re-opened my app.ino file, no more squiggles, and I get nice intellisense.
Controlling an LED
My built-in LED is on PIN #13 of the processor (I used the Arduino Board reference to check what was available); in your program there is an LED_BUILTIN constant already supplied that references it.
A bit of embedded basics here; everything you do in embedded programming is basically turning pins on and off on your processor.
The big arrow is pointing to a pin
Want to turn on an LED? Set the ‘level’ of the pin connected to the LED to HIGH (which means it has voltage on it). To turn it off, set the level to LOW (which means it has no/negligible voltage on it).
I had to configure the LED pin to be an output pin in my setup method, and then set it HIGH and LOW in my loop. Put some delays in there and you have a flickering LED!
This file contains hidden or bidirectional Unicode text that may be interpreted or compiled differently than what appears below. To review, open the file in an editor that reveals hidden Unicode characters.
Learn more about bidirectional Unicode characters
You can upload the program from the command palette (or CTRL+ALT+U).
GIF of an LED blinking (very exciting!)
You might encounter one or more problems getting that program downloaded (like I did):
COM Port
I had problems getting the COM Port (the Arduino connects as a virtual COM Port over USB) to work first time, so my code wouldn’t upload. I had to go into the main Arduino IDE and install the package it recommended for my board. This installed different drivers, which changed the COM Port to Atmel rather than Microsoft.
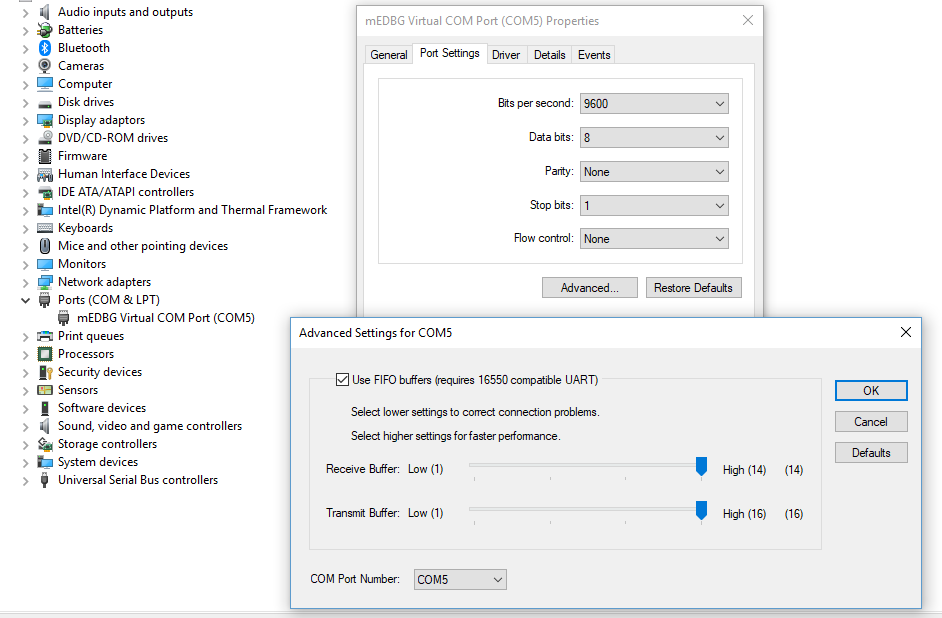
I also had to go into Windows Device Manager, go into the settings, and change the COM Port to not be the default COM3. Only then would it actually upload.
Select the Right Board!
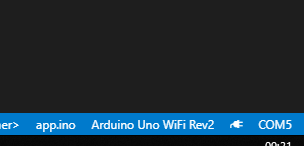
Pro Tip – make sure you pick the right board in the VSCode footer, and select the processor.
Mine is the Arduino Uno WiFI Rev2, with the A4809 processor.
Hello World
Next step, I want to do the tried and tested programming exercise of writing Hello World to the ‘Console’.
The Arduino doesn’t have a console to write to in the normal sense you might be familiar with; what it can do however is write to the Serial connection you use to upload your programs, and the Arduino extension in VS Code can display it.
More embedded basics; Remember how I said that everything in embedded programming is turning pins on (HIGH) and off (LOW)? Well, that’s true of writing text to a Serial connection too, but we do it extremely quickly.
Luckily, we don’t have to do all the pin changes ourselves (phew); there are functions already supplied by the Arduino libraries that will do this for us.
When we configure our Serial port, we need to set its ‘baud’, or speed. This tells the Serial code how fast we want to send characters. 9600 baud means that we are sending approximately 9600 bytes/characters per second. Whatever is ‘listening’ on the other end needs to know the speed, otherwise you’ll just get junk out.
This file contains hidden or bidirectional Unicode text that may be interpreted or compiled differently than what appears below. To review, open the file in an editor that reveals hidden Unicode characters.
Learn more about bidirectional Unicode characters
So once we’ve setup our Serial Port, in our loop, once per second we print our Hello World to the Serial port.
Once you’ve copied that code into your app.ino, upload the program as you would normally.
Once you’ve uploaded your program, it’s initially a bit anti-climatic, nothing is obviously happening. To see the output, we need to open the Serial Monitor. Click on the little connection logo in the VS Code footer:
This will bring up the Serial Monitor. At this point, you will probably just be getting nonsense, so you will want to change the ‘baud’ for the Serial Monitor to 9600.
Once you’ve done that, you should get your Hello World being displayed!
Next Steps
Ok, so that’s it for now. Subsequent posts will cover: